
 The sun’s been shining here in Dingle, and with the onset of summer, I always think about sorbets. Fresher than ice cream and completely dairy-free, sorbets are often my ice cream of choice for warm weather.
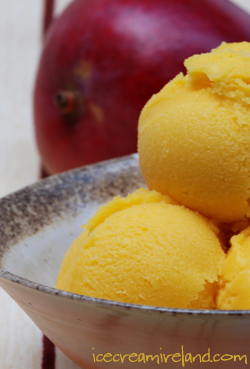
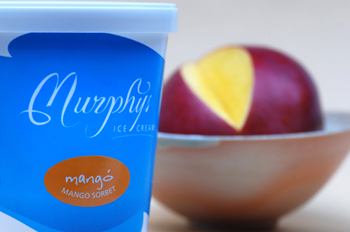
Mango sorbet is one of our favourites. It’s a flavour we have chosen to sell in our 500ml tubs, and it’s rarely out of the scooping cabinets in our shops. Make it, and you’ll see why. You will, however, need fresh, soft, ripe mangos!
In our cookbook, I wrote:
Mangos are considered in some cultures to be a food of the gods, and in my opinion one of the sexiest fruits in the world. Smooth, juicy, and utterly delicious, eating a ripe mango is an experience to relish. It might be messy, but it’s also sensual and delivers an explosion of taste. In sorbet, mangos are just as appealing. The texture of the fruit makes this frozen treat almost as creamy as an ice cream. We have made mango ice cream as well (including an award winning mango lassi flavour), but our favourite by far is this recipe, and we;re not the only ones to like it. It’s proven so popular in our shops that we have added it to the list of ice cream we supply to shops in our 500 ml tubs.
Mango sorbet can be served at any time or any occasion. Well able to stand on its own, it pairs perfectly with almost any ice cream or pastry. Viable as a sorbet course, it also excels as a dessert. It is light enough to be perfect after a heavy meal and flavourful enough to satisfy if the meal is simple. I am sure this versatility is why it’s so popular with the restaurants we supply, and you can hardly go wrong including it in your own dinner menu. I might suggest that because the fruit originated in Asia, it’s especially great with Indian or Thai food. If you’ve cooked up a spicy curry, then mango sorbet served after will cool, balance and restore the taste buds as well as sweeten the evening.
Murphys Mango Sorbet
 Ingredients:
- 300 g sugar
- 500 ml boiling water
- 2 ripe mangos (ca. 300 g each before they are peeled and pitted)
- Juice of 1 orange
- Juice of 1 lemon
What to do:
- Add the boiling water to the sugar in a heat-proof bowl.
- Cover and refrigerate until it is completely cool.
- Peel and slice the mango.
- Juice the orange and lemon.
- Combine the lemon and orange juice with the mango in a blender or food processor and blend thoroughly.
- Add to the cooled sugar syrup.
- Freeze using a domestic ice cream maker until it has a semi-solid consistency. This could take up to 20 minutes.
- Transfer to a freezer-proof container and freeze until it is solid.
 Otherwise, simply place in a covered, freezer-proof container and place in the freezer, stirring every two hours to break up the ice crystals.
- Remove from freezer and allow to thaw for about 15 minutes before serving.
Enjoy!
Yield: 8 Servings


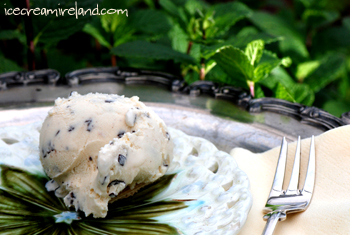 With the weather finally warm, it’s a perfect time for mint ice cream. This is a flavour that helped define my childhood – it was definitely my favourite for many years. It’s fresh and cooling, smooth and has a bit of chocolate for a satisfying crunch. It’s also one of the flavours you will find in our
  Ingredients:
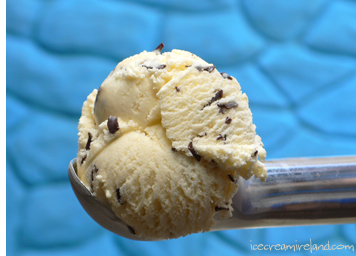 If you’re using a domestic ice cream machine, transfer to a freezer-proof covered container when the ice cream has achieved a semi-solid consistency (around 15 minutes). Place it in the freezer, and continue to freeze until it is solid.
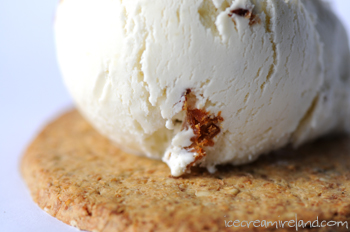 OK – gentle readers – before you throw a tantrum, and yell “What???? Blue cheese ice cream?” I will tell you a story. A couple of weeks ago, my brother and I were discussing the
 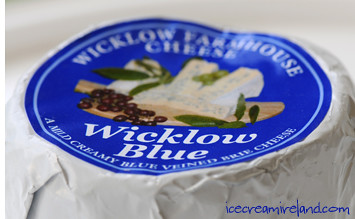 The next day, however, I began thinking some more about what Sean said, especially since he usually is right. The idea of highlighting an Irish cheese or two was certainly appealing. Sean and I talked some more and decided that a cheese ice cream would make us both happy. Blue cheese, Sean suggested, might be the most interesting. I had heard about blue cheese ice cream being made in the UK, but had never tried it, and a chef we know had once suggested a cheese and caramelised shallot ice cream. So… I started playing.
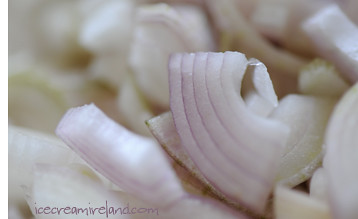
 Immediately remove from the heat.
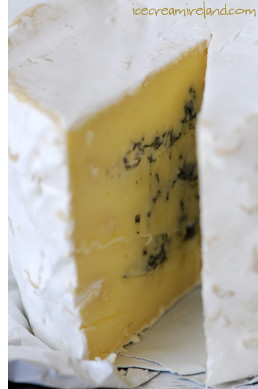
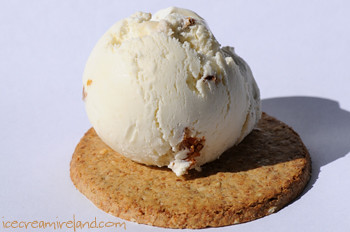 This ice cream will only be as good as the blue cheese you use. Find one you like!
  Since I seem to be on a baking kick, I’ll post this meringue recipe. I’ve written up recipes before – most recently
 Store in an air-tight container.
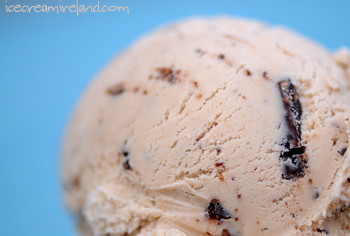 This is one of the best flavours I think we have ever made. We’ve tried chocolate truffle ice creams before, but the question has always been what is the best base to support them? A vanilla base can be a bit bland, and a chocolate base can over-power.
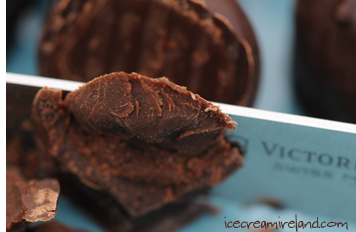 125g sugar
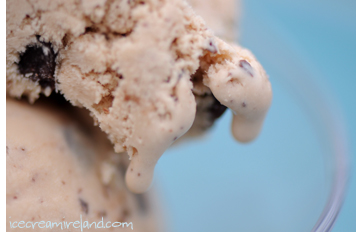 Freeze the ice cream using a domestic ice cream machine, adding the chopped truffles once the ice cream has become semi-solid.
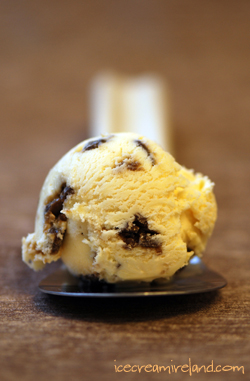 I grew up with toffees of various kinds – English toffees in white wrappers, salt water taffy, and toffee apples at farm fairs.
 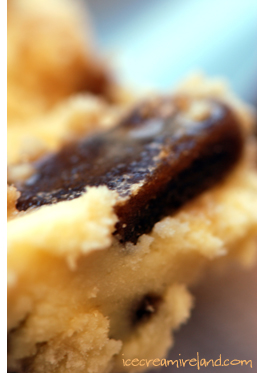 Whip the cream until it has doubled in volume (you should have soft peaks – don’t over-whip).
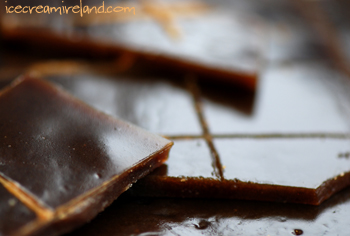 I’m in a sweet frame of mind, and here’s a toffee I love to munch on. It’s also used in our Toffee Ice Cream, and I’ll put up the recipe for that in due course. I always love making candy, because I find it such a miracle that sugar can transform itself so radically.
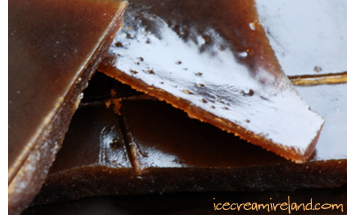 Allow to cool somewhat.
 A reader of this blog emailed me asking for a green tea ice cream recipe, so here it is! It’s a recipe that will be in the
 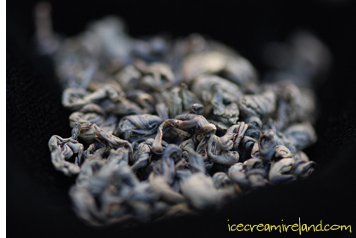 Here in Ireland, I have also come across green tea ice cream in some of the ever-proliferating Asian restaurants, so perhaps you have tried it as well. If so, just be aware that since we don’t believe in food colouring, we use green tea leaves (see photo right) and not the
 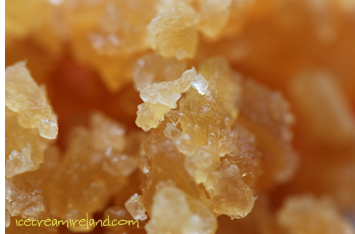 Chop the crystallised ginger into small pieces.