How to Make a Banana Split

Banana Split

It seems the banana split was invented by a fellow named Strickler in Latrobe, Pennsylvania in 1904, although there is a bit of controversy about the fact.

In any case, it is an easy and indulgent treat to prepare, and the combination of the fruit, ice cream, and sauce, makes it a delight to consume.

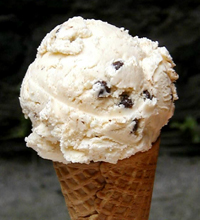
To prepare it, simply take a banana and split it lengthwise. Pile on three scoops of ice cream (traditionally vanilla, chocolate and strawberry, although we substitute honeycomb in our shops.) Don’t make them too big – it’s already a big dessert!

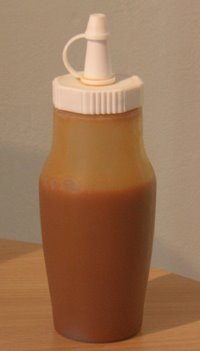
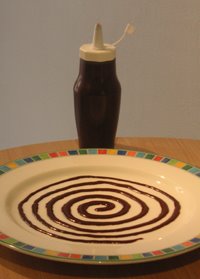
Pour some chocolate sauce over the ice cream (you could also use caramel, or anything else that takes your fancy – pineapple was traditionally included).

Then pile on some whipped cream, and sprinkle chocolate shavings or sprinkles, nuts, or other toppings you enjoy over the cream.

A biscuit stuck in each scoop of ice cream completes the effect, and all that’s missing is the spoon!

Technorati tags: , , , ,

Payard’s Lemon Tart

Lemon tart

I am in the rare position of having enough coverage in the Dingle shop that I have a bank holiday weekend off. After enjoying the sun yesterday, today was bleak and rainy, and so I turned my attention to another new cookbook that I acquired – Simply Sensational Desserts by Francois Payard.

Payard, originally from Nice, is an award-winning dessert chef in NY, and I must say that his lemon tart was a huge success among my lucky family members. The only comment is that the filling didn’t really fill the crust, but then my pie dishes are 10 1/2 inches, which is probably bigger than he’d expect. I’d increase the volume of ingredients next time.

Also, similar to my rant on flour, it’s impossible for me to find normal confectioners sugar in the shops (and we ran out of it in production). What they have here is icing sugar, but it’s laced with all sorts of other ingredients and behaves very strangely. I substituted caster sugar in the crust, and it seemed to work ok although the dough was a bit delicate. I’d probably put a little less in next time and add more flour.

I will try the chocolate tart next and let you know how I get on, but on the balance of one trial, I highly recommend the book. The other recipes look delicious!

Technorati tags: , , , , ,

New Toy – Photographing Food

Conor ConeAfter much frustration with my digital camera, I took the plunge and dropped a bit of cash for a Leica. I was having trouble with the food shots, especially in low light. Rather than go for a huge SLR, I decided to stay compact but invest in something with a great lens.

With the help of a photographer friend, I chose the D-LUX 2 and ordered it from the UK.

Two days later it was here, and I’ve had a ball playing. After an ice cream bribe, I even got my nephew to pose!

I can’t wait to get it into the kitchen…

Technorati tags: , , , ,

How to Make a Milkshake

Today in the Dingle shop, as part of our preparations for the Easter rush, we had a meeting with myself, my brother, and the two shop managers to work out exact specifications for each of our desserts. Basically that means we made each of our desserts and argued over what exactly goes into them and what’s the best way of serving them.

We ended up with lots of desserts that we had to eat and, after tackling a sundae, I was faced with a chocolate milkshake. There is worse punishment to be had!

It’s easy making a milkshake, but hard making it smooth with a regular blender or food processor (we have a special shake blender). Here’s how you can do it:

Chocolate milkshakeMurphys Chocolate Milkshake

Ingredients (serves 1): 

2 scoops Murphys chocolate ice cream

1 cup milk.

What to do:

1. Put the chocolate ice cream and milk in the blender or food processor and allow it to soften for at least five minutes (or more if you followed my storage instructions and had to chip it from a rock-hard tub). Blending it straight away will leave lumps of ice cream in the shake.

2. Blend until smooth on high speed.

3. Garnish with cream and chocolate shavings if you have the patience and any about the place.

Enjoy!

(Of course it doesn’t have to be chocolate. You can make a milkshake with any flavour ice cream.)

Technorati tags: , , , , ,

Tips on Buying and Storing Ice Cream

mint cone Although probably most of you know all about this, I thought it might be a good idea to discuss a few tips on buying and storing ice cream. There’s not much to it, and it might be a boring subject, but it can make a big difference in terms of ice cream enjoyment when the spoon comes out!

Ice cream can become icy or grainy when it’s not stored properly, and flavours can taste diminished.

So, starting at the shop:

1. Do the rest of your shopping first and pick up the ice cream last.

2. Make sure the ice cream tub is hard in the freezer. If it feels soft, the shop’s ice cream freezer may not be cold enough and the ice cream may not be at its best. It’s possible that the freezer is just going through a defrost cycle, but if it’s a regular occurrence, you should bring it to the attention of the shop manager.

3. Make sure the ice cream is well within its “best before” date.

When you get home:

1. Put the ice cream away in the freezer first (that is, if you don’t want to eat it immediately!). Bury it it in the back, if possible. Ice cream becomes icy when it gets soft and refreezes.

2. There is no such thing as storing ice cream too cold. If you have a freezer that is colder (chest freezers are usually around -30C) and one that is warmer (a normal freezer should be around -18C), keep it in the cold one!

3. If you open it, eat some, and return it to the freezer, putting on a layer of plastic wrap before replacing the lid will help keep the ice cream air-tight.

Finally, never refreeze ice cream that has been out of the freezer a long time or ice cream that has become melted! It could be a food safety issue.

Technorati tags: , , , ,

Sauce, Ice Cream and Decoration

After passing on the recipes for chocolate and caramel sauce, I thought perhaps it might time for a brief mention of dessert decoration.

Now I am not a dessert chef but an ice cream man, and I tend to think in terms of quality of product, not quality of presentation. It is inescapable, however, that good presentation not only impresses your customers or dinner guests, but it also actually makes the dessert taste that little bit better.

The cool thing about a bit of decoration is that you can take something as simple as a scoop of ice cream and get a certain “wow” factor from the lucky recipients with a tiny bit of effort.

Since not everyone has access to cream dispensers, chocolate cups, sugar sticks, and other tricks of the trade, here’s a dead simple tip. Go down to your local shop that sells basic kitchenware and invest in one or more little plastic ketchup/mustard bottles. Make sure they have a narrow tip.

Fill them up with your sauce(s) and you can decorate away to your hearts content, basically drawing patterns! I’m sure you can come up with cooler designs than me!

A bit of fresh fruit and cream would dress it up even further, and with two different sauces you really can go wild.

If you use a big plate as your palette, the dessert will look better. Also, a white plate probably shows off your artistry best.

By the way, our chocolate sauce recipe has so much chocolate that it will go hard when it gets cold. You will need to reheat it, and the easiest way is to stick the bottle in a cup of hot water…

Thanks to Dan for his hand and design in the top photo!

Technorati tags: , , , , ,